Introduction to MVC (Model, View, Controller)
Learning Goals
- Describe the elements of the MVC design pattern
- Identify the single responsibility of each of the Model, View, and Controller
- Build our first ASP.NET MVP Application
Today is a big day in your developer journey! We’re going to put all of the pieces together and build a full application using the MVC pattern.
Here is our plan:
- Get Starter Project Running
- Add a Controller
- Add a View
- Controller and View Practice
- Add a Model
- Connect the M, V, and C
- Zoom Back Out and Draw a Diagram
1. Get Starter Project Running
For today’s lesson, we are going to build off of some starter code. MVC is the focus of today, not the starter code, so don’t worry about what’s already there.
Let’s all fork and clone this repo: https://github.com/turingschool-examples/MvcMovieStarter
If you’re curious, this is what has been done so far:
- Use the ASP.NET Core Web App (Model-View-Controller) template to create a new project
- Install the following packages
- Npgsql.EntityFrameworkCore.PostgreSQL
- Microsoft.EntityFrameworkCore.Tools
- EFCore.NamingConventions
- Configure database connection string in appsettings.json
- Add dbContext in DataAccess/MVCMoviesContext.cs
- Register the context in Program.cs using the database connection string and snake_case naming convention
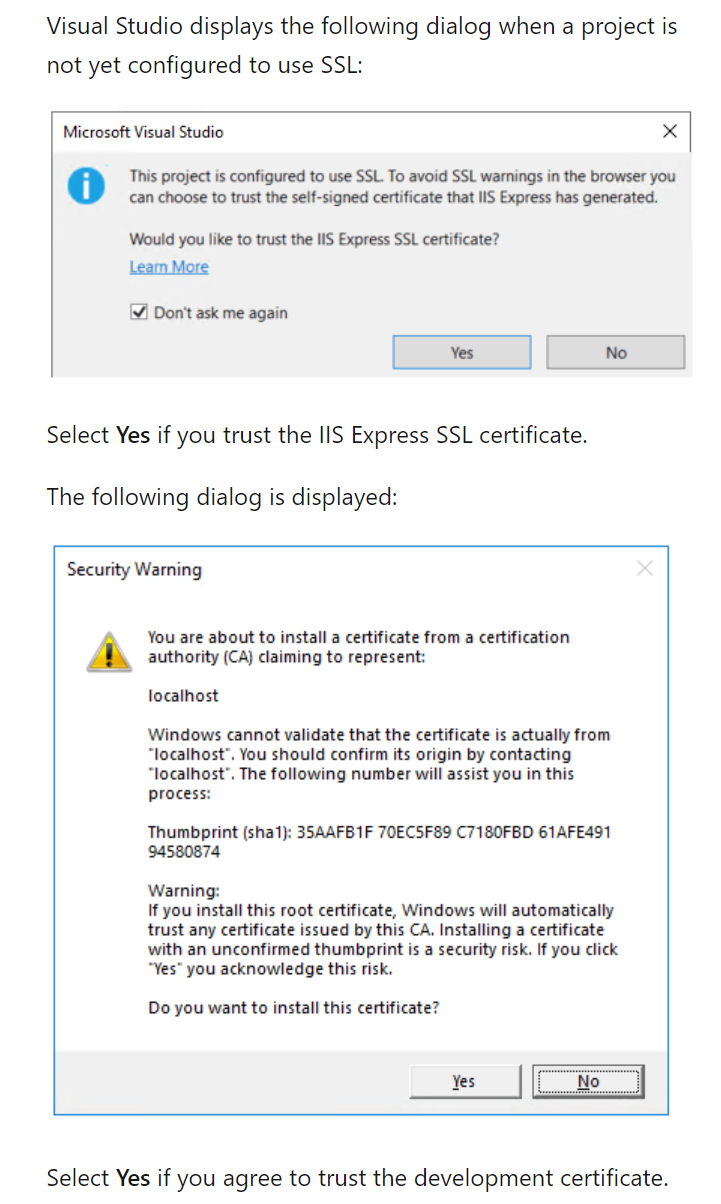
To run this application, click the outlined “play” button to “Start Without Debugging”. You will probably see the following confirmations
When you click start, Visual Studio runs the app and opens it in the default browser. You should see a page that says “Welcome Learn about building Web apps with ASP.NET Core.”
The address bar shows localhost:<port#>. Localhost means the application is running on your local computer.
2. Add a Controller
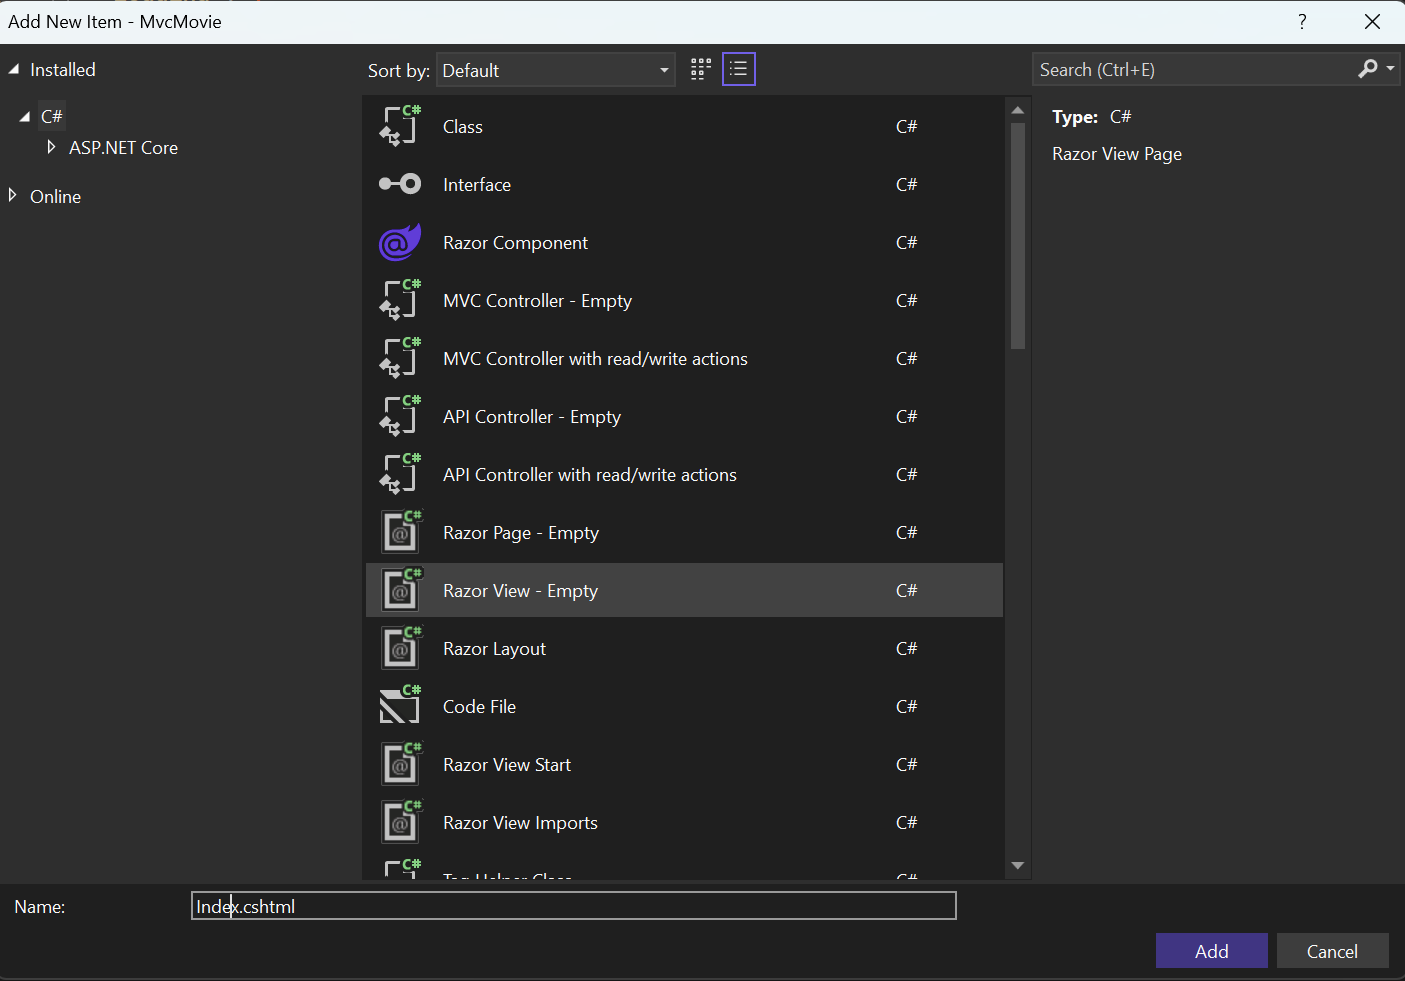
We’re going to use the scaffolding tool in Visual Studio to create our controller. Follow the instructions in the following image
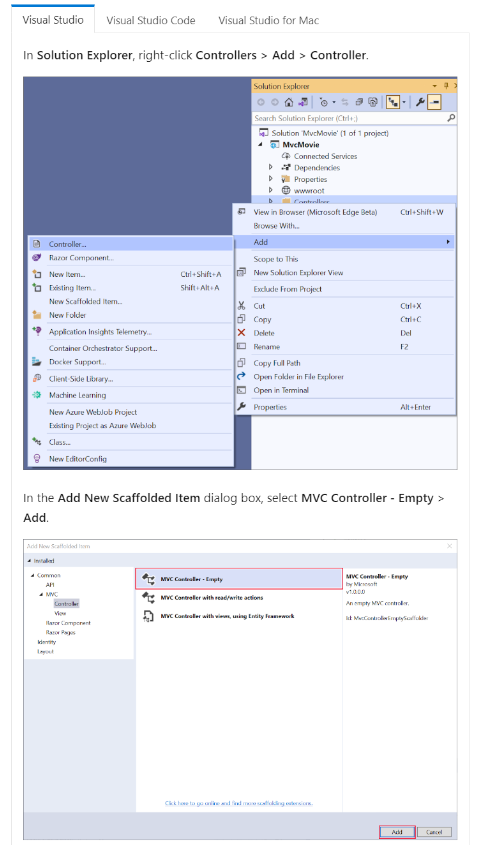
In the Add New Item - MvcMovie dialog, enter MoviesController.cs and select Add.
Your generated controller should look like this, except for the comment I added for clarity:
using Microsoft.AspNetCore.Mvc;

namespace MvcMovie.Controllers
{
    public class MoviesController : Controller
    {
        //GET: /movies/
        public IActionResult Index()
        {
            return View();
        }
    }
}
Every public method in a controller is callable as an HTTP endpoint.
An HTTP endpoint:
- Is a targetable URL in the web application, such as
https://localhost:<port#>/movies.
Combines:
- The protocol used: HTTPS.
- The network location of the web server, including the port: localhost:5001.
- The path: Movies.
In your browser, navigate to https://localhost:<port#>/movies.
You should get an Error that looks like the following:
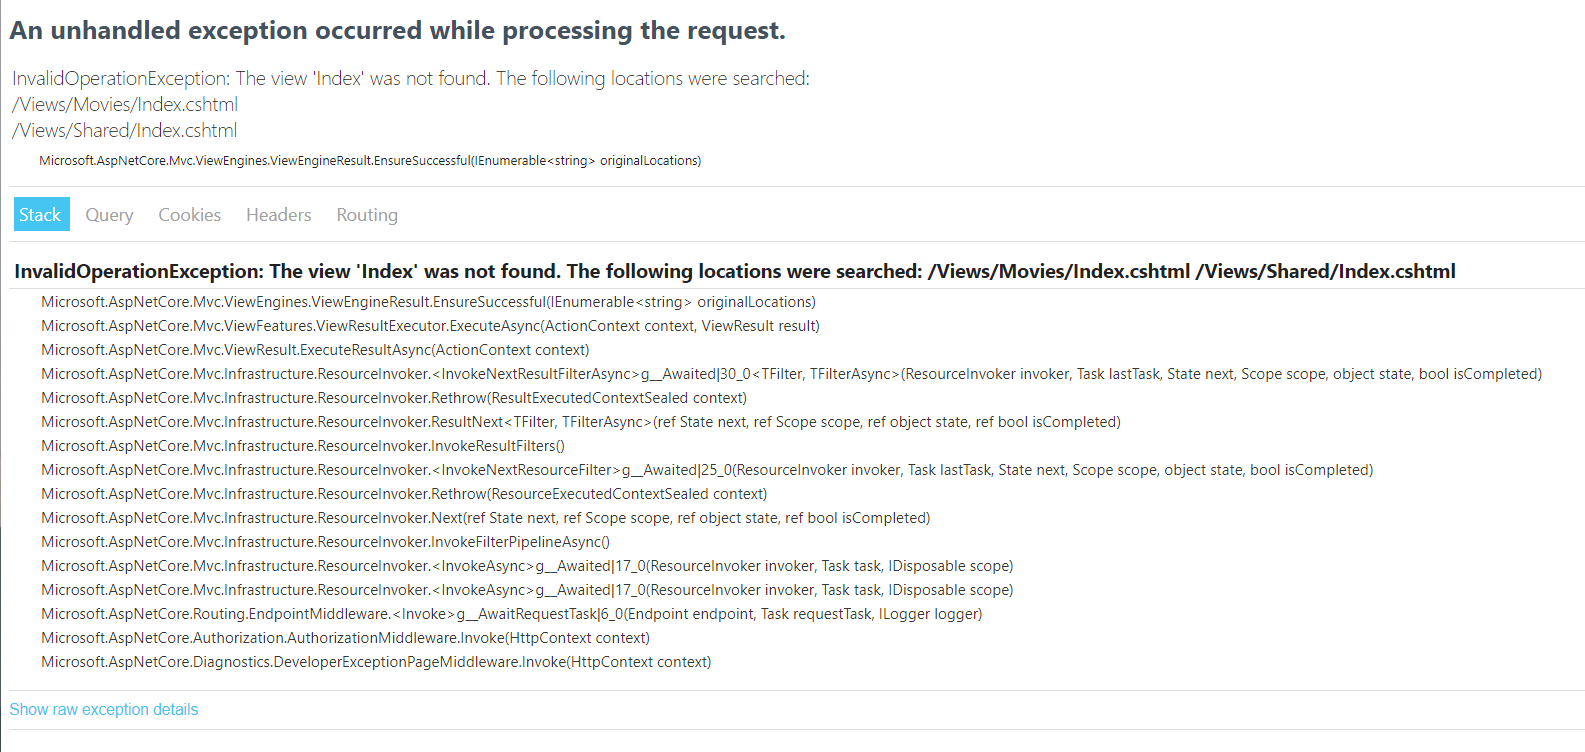
InvalidOperationException: The view 'Index' was not found. The following locations were searched: /Views/Movies/Index.cshtml /Views/Shared/Index.cshtml
We know from the Request and Response cycle lesson that our application needs to return something in response to the HTTPS request. We are trying to return return View();, but we haven’t yet created that view!
3. Add a View
View templates are created using Razor.
Razor-based view templates:
- Have a .cshtml file extension.
- Provide an elegant way to create HTML output with C#.
We will use Visual Studio to create a new view. Let’s all follow these steps:
- Right-click on the Views folder, and then Add > New Folder and name the folder Movies.
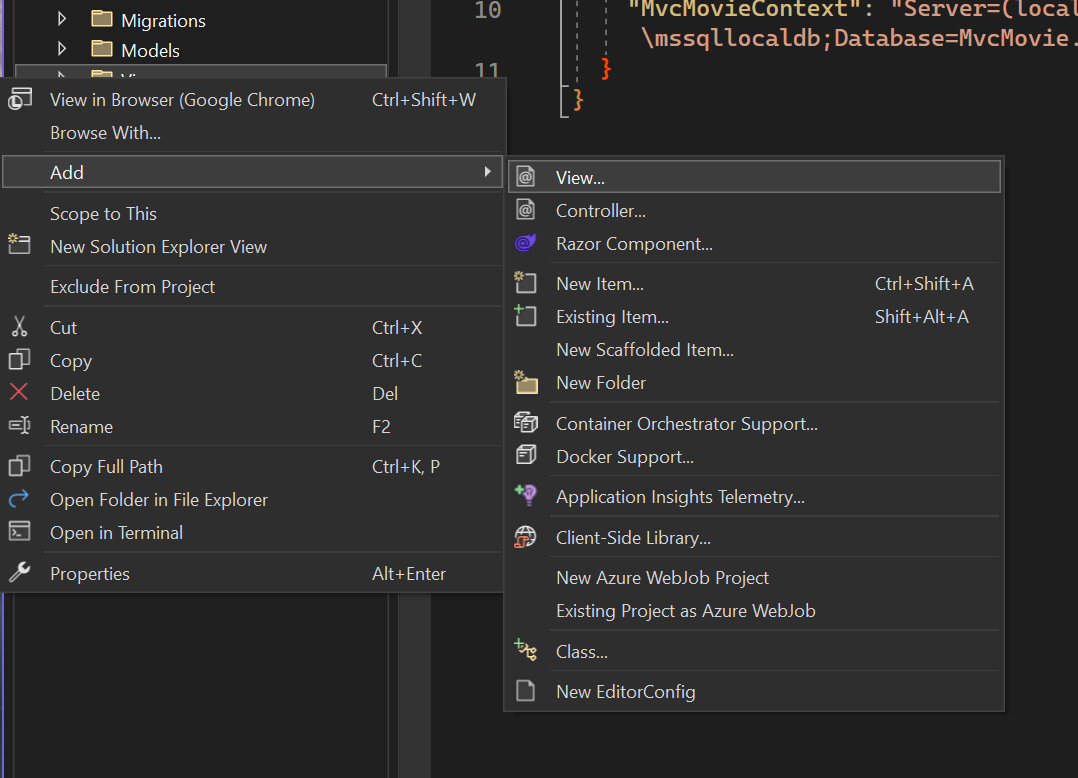
- Right-click on the Views/Movies folder, and then Add > New Item
- In the Add New Item - MvcMovie dialog:
- Select Razor View - Empty
- Keep the Name box value,
Index.cshtml - Select Add
Replace the contents of the Views/Movies/Index.cshtml Razor view file with the following:
<h1>Movies</h1>

<p>All of the movies data will be shown here!</p>
Navigate again to https://localhost:<port#>/movies.
But even after adding our view we still see the error messages. Try refreshing the page, still broken, right?
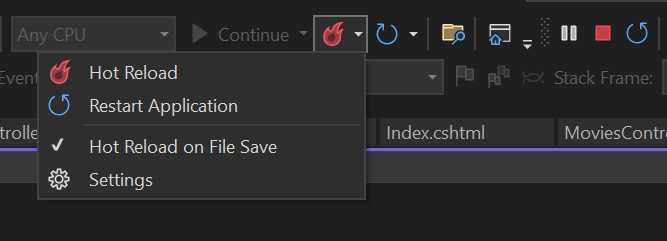
We want to enable Hot Reloading so that we don’t have to stop and start the application to see our changes. I recommend enabling Hot Reload on File Save.
The error should be gone, and you should now see “Movies All of the movies data will be shown here!”
The Index method in the MoviesController ran the statement return View();, which specified that the method should use a view template file to render a response to the browser.
A view template file name wasn’t specified, so MVC defaulted to using the default view file. The default view has the same name as the action method, Index in this example. The view template /Views/Movies/Index.cshtml is used.
4. Controller and View Practice
With your partner complete the following challenges:
- Create create a new route in your Movies controller so that when a user visits
https://localhost:<port#>/cartthey see the string “Here are all of the movies you want to buy”. You will want to create an additional view calledCart.cshtmlto make this work! - Create a new controller called
BooksController.cs. When you navigate tohttps://localhost:<port#>/booksthe page should have the title “Books” and message “All of the books data will be shown here!”. What other file(s) and folder(s) will you need to add to make this work? - Hungry For More? Add additional routes to your BooksController.
5. Add a Model
These model classes are used with Entity Framework Core (EF Core) to work with a database.
Let’s start by adding a new model class.

Update the Models/Movie.cs file with the following code:
namespace MvcMovie.Models
{
    public class Movie
    {
        public int Id { get; set; }
        public string Title { get; set; }
        public string Genre { get; set; }
    }
}
The Movie class contains an Id field, which is required by the database for the primary key.
Setting up our DB
Our next step is to add our Movie model to our database context.
Update DataAccess/MvcMovieContext to the following:
using Microsoft.EntityFrameworkCore;
using MvcMovie.Models;

namespace MvcMovie.DataAccess
{
    public class MvcMovieContext : DbContext
    {
        public DbSet<Movie> Movies { get; set; } // This line is new!

        public MvcMovieContext(DbContextOptions<MvcMovieContext> options) : base(options)
        {

        }
    }
}
Then we need to create our migration and apply that migration.
Open up Tools > NuGet Package Manager > Package Manager Console
Add-Migration InitialCreate
Update-Database
Then we need to insert some data into our database. Open up pgAdmin and use the query tool to run the following SQL to insert some movies.
INSERT INTO movies (title, genre)
VALUES ('Elf', 'Holiday');

INSERT INTO movies (title, genre)
VALUES ('Finding Nemo', 'Kids');
6. Connect the M, V, and C
We now have created our Model, View, and Controller and it’s time to put the pieces together.
Access Data From Our Controller
We want our controller to access data from our database using our Model.
Update your MoviesController with the following:
using Microsoft.AspNetCore.Mvc;
using MvcMovie.DataAccess;

namespace MvcMovie.Controllers
{
    public class MoviesController : Controller {

        private readonly MvcMovieContext _context;

        public MoviesController(MvcMovieContext context)
        {
            _context = context;
        }

        public IActionResult Index()
        {
            foreach (var movie in _context.Movies)
                {
                    Console.WriteLine($"Movie {movie.Id}, Title: {movie.Title}, Genre {movie.Genre}");
                }
            return View();
        }
    }
}
This is using something called dependency injection to get access to our database context. Don’t worry about how that works right now, let’s stay focused on the M, V, and C.
Navigate to https://localhost:<port#>/movies in your browser and take a look in your console. You should see the following which lets us know that we have successfully accessed our Movies!
Movie 1, Title: Elf, Genre Holiday
Movie 2, Title: Finding Nemo, Genre Kids
Pass data from controller into view
But we don’t just want the data to show up in our console, we want it to show up in the View that we send back as our response.
Update your MoviesController with the following to pass the Movies into your view:
using Microsoft.AspNetCore.Mvc;
using MvcMovie.DataAccess;

namespace MvcMovie.Controllers
{
    public class MoviesController : Controller {

        private readonly MvcMovieContext _context;

        public MoviesController(MvcMovieContext context)
        {
            _context = context;
        }

        public IActionResult Index()
        {
            var movies = _context.Movies; //This line changed!
            return View(movies); //This line changed too!
        }
    }
}
Finally, we need to update the View to display the movies.
Update your Views/Movies/Index.cshtml file to match the following:
// This line tells us what data is getting passed to our View
@model IEnumerable<MvcMovie.Models.Movie>

<h1>Movies</h1>

<p>All of the movies data will be shown here!</p>

@foreach (var movie in Model)
{
    <p>Title: @movie.Title, Genre: @movie.Genre</p>
}
❓What about this code looks different than typical HTML?
This is an example of the Razor syntax, it allows us to insert C# code into our HTML file.
7. Zoom Back Out and Draw a Diagram
We built our first full .Net application! Great job! There are a lot of pieces involved in organizing our code well using the MVC structure.
With your group: Let’s draw out how our Model, View, and Controller are connected in our MvcMovies application. In your drawing add the specific file names for the M, V, and C parts of our application.