Git Installation
Welcome to the wonderful world of Git, a powerful version control system that is free and open source. Git is designed to handle small to very large projects with speed and efficiency.
Let’s walk through how to install Git on your local machine.
Website
- Go to the Git website.
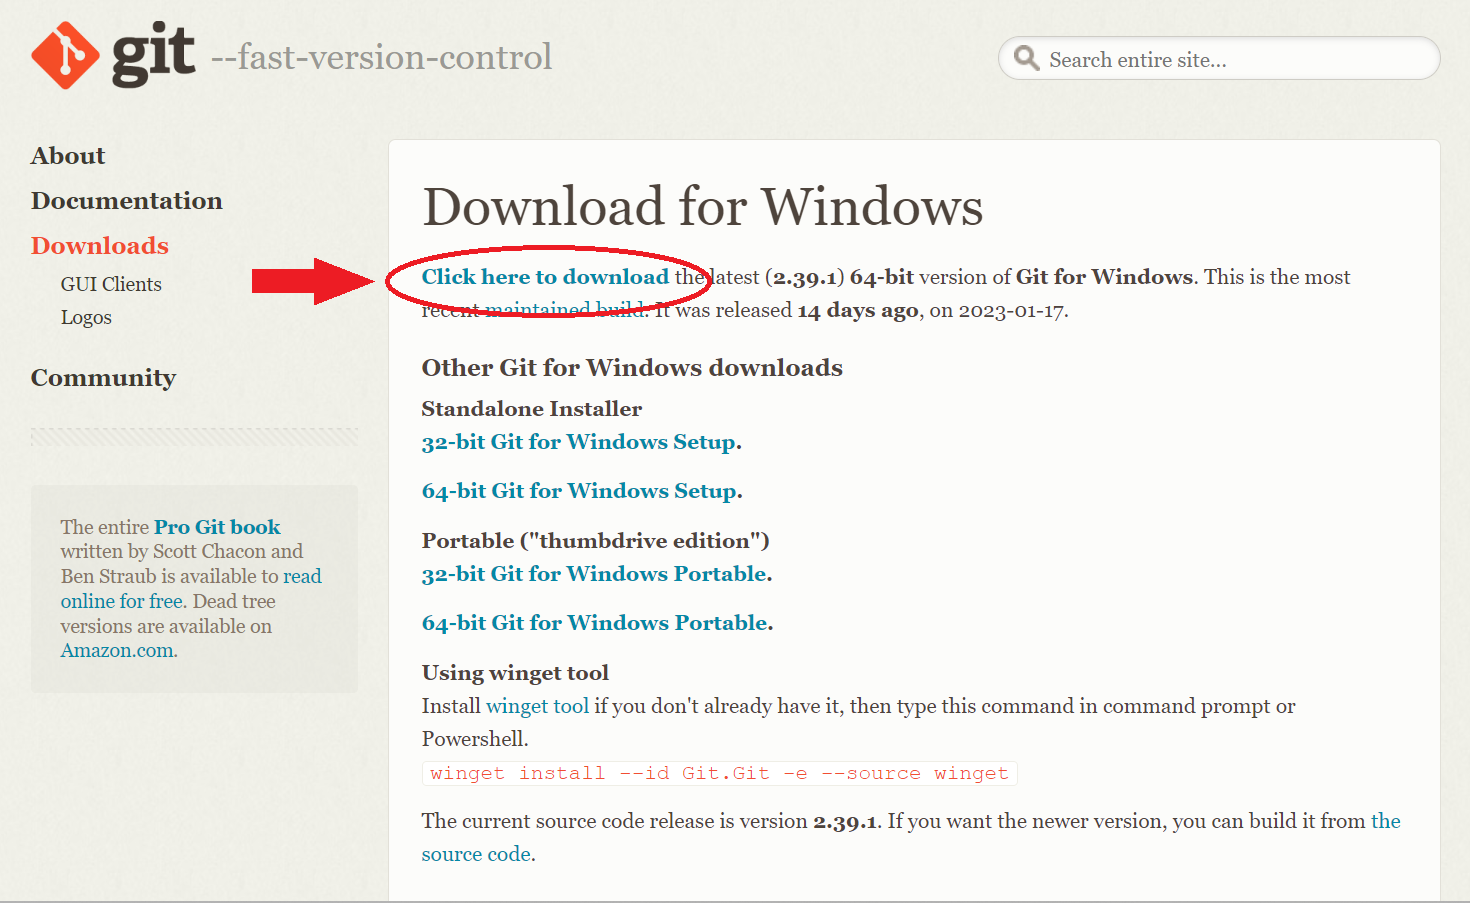
- Click the Click here to download link to download the latest version of Git. Alternately, you can click the 64-bit Git for Windows Setup link.
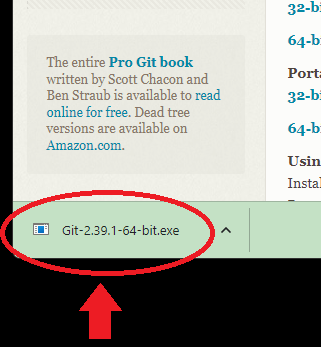
The file will download with a name in the following form:
Git-#.##.#-64-bit.exe. The#signs represent the version number. The version number in the image is2.39.1, so the file name isGit-2.39.1-64-bit.exe.
- After the software has downloaded completely, click the icon of the downloaded file.
Git Setup
A window will appear to begin Git Setup. You will accept the default settings on most of the installation steps. No image is provided for those steps, but make sure to check the title on the screen as you click through each window. For steps that require your input, an image is provided for you to check your entry before moving forward.

Accept Defaults
Accept the defaults for the first few screens. Stop when you get to the Choosing the default editor used by Git screen.
- Click Next on the Information screen to begin setup.
- Click Next on the Select Destination Location screen to accept the default folder.
- Click Next on the Select Components screen to accept the default options.
- Click Next on the Select Start Menu Folder screen to accept the default folder.
Default Editor
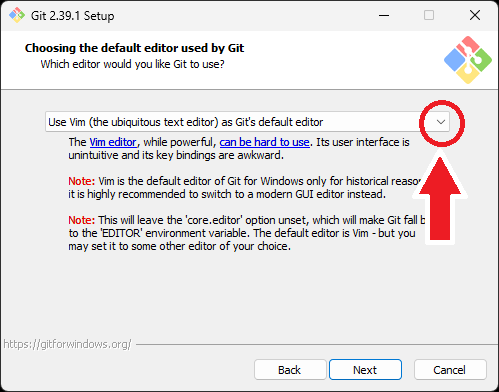
There’s a rather ominous warning about using the Vim editor as Git’s default editor. It’s not wrong; Vim is not intuitive nor easy to pick up, especially when learning a lot of other new tech. You will want to change this setting immediately.
On the Choosing the default editor used by Git screen:
- Click the dropdown arrow.
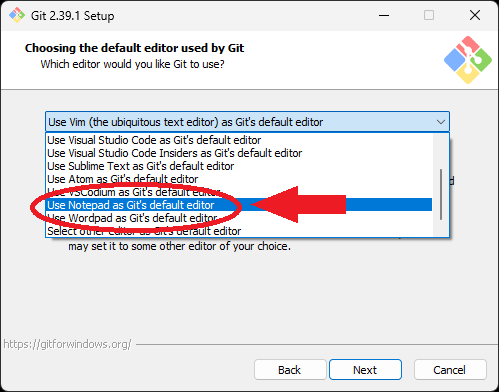
- Select Use Notepad as Git’s default editor from the dropdown menu.
- Click Next.

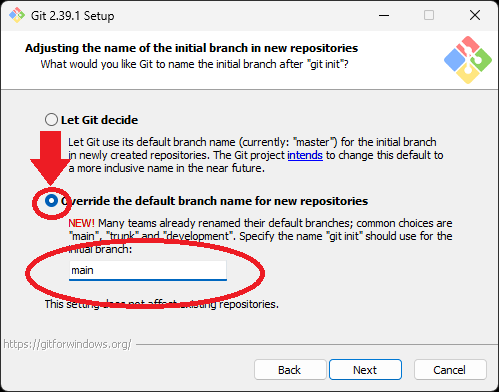
Initial Branch
For a long time, the default branch in Git was called master. The tech community has since embraced more meaningful and inclusive terms. The most common name for the default branch in Git is now main.
On the Adjusting the name of the initial branch in new repositories screen:
- Select the Override the default branch name for new repositories option.
- Type
mainin the text box. - Click Next.
More Defaults
Accept the defaults for the remaining screens before the final Install step.
- Click Next on the Adjusting your PATH environment screen to accept the default selection.
- Click Next on the Choosing the SSH executable screen to accept the default selection.
- Click Next on the Choosing HTTPS transport backend screen to accept the default selection.
- Click Next on the Configuring the line ending conversions screen to accept the default selection.
- Click Next on the Configuring the terminal emulator to use with Git Bash screen to accept the default selection.
- Click Next on the Choose the default behavior of `git pull ` screen to accept the default selection.
- Click Next on the Choose a credential helper screen to accept the default selection.
- Click Next on the Configuring extra options screen to accept the default options.
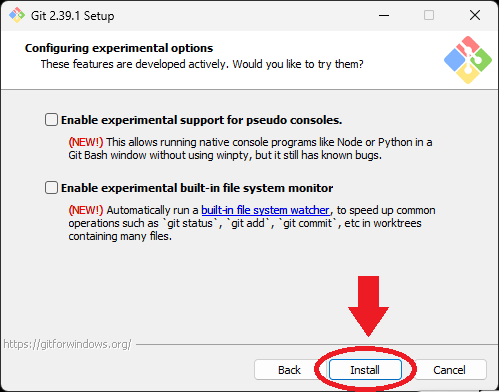
- Lastly, click Install on the Configuring experimental options screen to accept the default options and install Git on your machine.
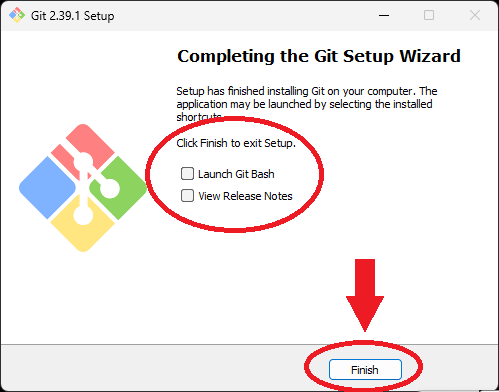
Finishing Up
On the Completing the Git Setup Wizard screen:
- Deselect/uncheck all options on the screen.
- Click Finish.
Congratulations, you have installed Git on your local machine. This probably means nothing to you right now, but will become very important as you continue building software and working on projects independently and with other developers.